 When winter temperatures drop in Louisiana, frozen pipes become a real concern for homeowners throughout the Northshore and New Orleans area. While we don’t deal with extreme cold as often as our northern neighbors, those occasional freezing nights can cause serious plumbing problems if your pipes aren’t protected. The good news? Pipe insulation is one of the more manageable DIY plumbing projects you can tackle, and it can save you from costly repairs down the road. Let’s walk through everything you need to know about insulating your pipes the right way.
Why Pipe Insulation Matters
Before we get into the how-to, it’s worth understanding why pipe insulation is so important. When temperatures drop below freezing, the water inside your pipes can freeze and expand. This expansion creates pressure that can crack or burst pipes, leading to water damage that can cost thousands of dollars to repair.
But pipe insulation isn’t just about preventing freezing. It also helps your hot water stay hot as it travels from your water heater to your faucets, which can lower your energy bills. In older homes throughout St. Tammany Parish and surrounding areas, proper pipe insulation can make a noticeable difference in water temperature and energy efficiency.
It’s also worth noting that though pipe insulation does help stop your pipes from freezing, in very cold temperatures it isn’t a guarantee. You’ll still want to take your normal precautions such as dripping your faucets and opening your cabinet doors to let your warm air in.
Which Pipes Need Insulation?
Not every pipe in your home needs to be insulated, so knowing where to focus your efforts will save you time and money. Your priority should be pipes that are exposed to cold air or outdoor temperatures.
Focus on these areas:
Pipes in unheated spaces like crawl spaces, attics, and garages are at the highest risk for freezing. Any plumbing in these areas should be insulated. Pipes along exterior walls also need attention, especially if there’s limited insulation in the wall cavity. Outdoor faucets and the pipes leading to them should be protected too.
Hot water pipes throughout your home can benefit from insulation as well, even in heated spaces. This keeps the water hotter as it travels through your plumbing system and reduces the energy your water heater needs to use.
Choosing the Right Pipe Insulation Materials
Walk into any hardware store and you’ll find several options for pipe insulation. Each type has its pros and cons, so picking the right one depends on your specific needs and budget.
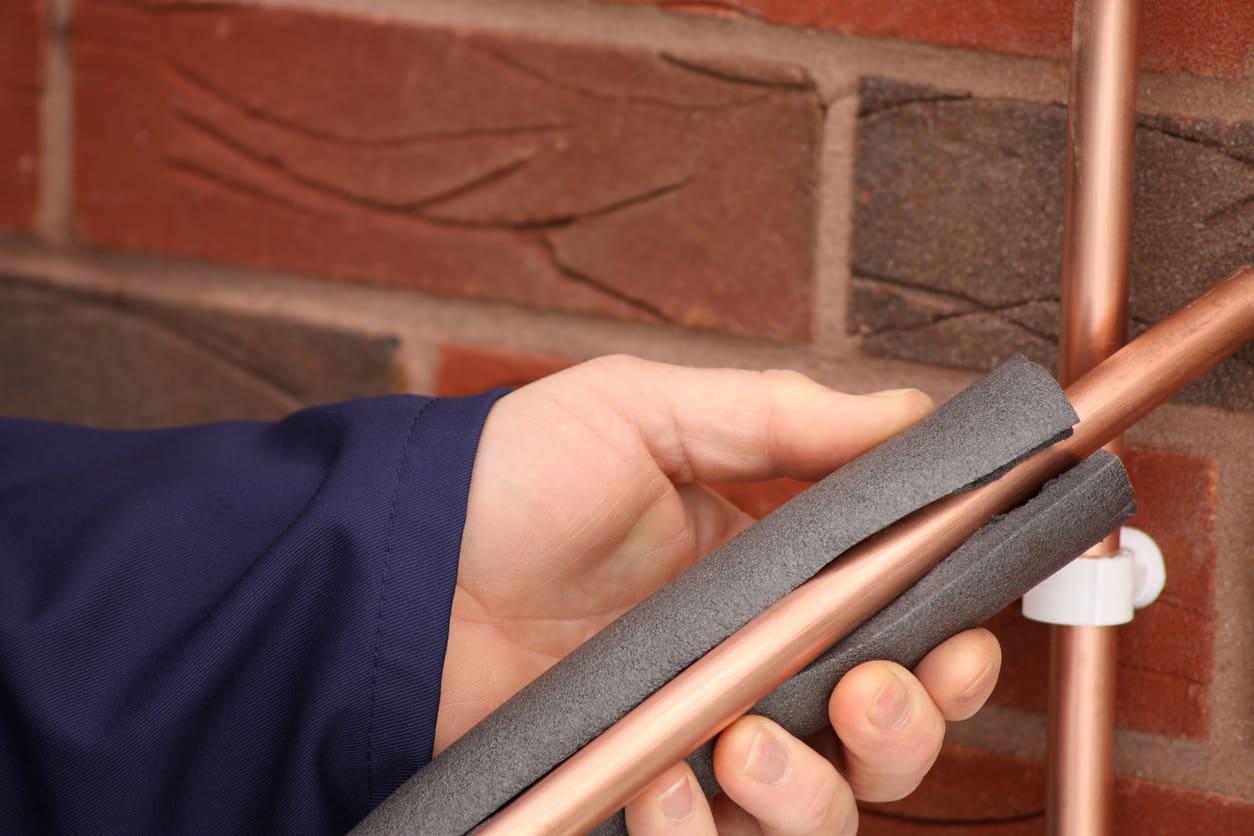
Foam pipe sleeves are the most common choice for DIY pipe insulation projects. These pre-slit tubes slide over your pipes and come in various sizes to fit different pipe diameters. They’re affordable, easy to install, and work well for most applications. You’ll find them in different thicknesses—thicker insulation provides better protection but costs a bit more.
Fiberglass pipe wrap is another option that works well for pipes with lots of bends and turns where foam sleeves might be awkward. You wrap it around the pipe and secure it with tape or wire. It provides good insulation but takes more time to install properly.
Heat cable or heat tape is a specialized option for pipes that are particularly vulnerable to freezing. These electrical heating elements wrap around the pipe and plug into an outlet, providing active heating when temperatures drop. They’re great for exposed outdoor pipes or areas where passive insulation isn’t enough.
Tools and Materials You’ll Need
The beauty of pipe insulation is that it doesn’t require fancy tools. For a basic installation, you’ll need a tape measure to determine how much insulation you need, a utility knife or scissors to cut the foam sleeves to length, and aluminum foil tape or PVC tape to secure the insulation.
If you’re using heat cable, you’ll also need electrical tape and possibly zip ties to keep everything in place. Having a flashlight or headlamp helps when working in dark crawl spaces or attics.
Step-by-Step Pipe Insulation Installation
Now let’s get into the actual installation process. Don’t worry—this is one of those projects where taking your time and being thorough matters more than having advanced skills.
Step 1: Measure Your Pipes
Start by measuring all the pipes you plan to insulate. Measure the length you need to cover and note the diameter of each pipe. Most residential plumbing uses half-inch or three-quarter-inch pipes, but double-check before buying materials.
Step 2: Buy the Right Amount
Purchase enough pipe insulation to cover all your vulnerable pipes, plus an extra 10 percent to account for mistakes or areas you might have missed. It’s better to have too much than to make another trip to the hardware store.
Step 3: Clean the Pipes
Before installing insulation, wipe down your pipes to remove dust, dirt, and moisture. This helps the insulation fit better and any tape stick properly.
Step 4: Install Foam Sleeves
If you’re using foam pipe sleeves, open the pre-slit seam and slide the foam over the pipe. The slit should face down or to the side to prevent moisture from getting inside. Cut the foam to length as needed using your utility knife.
At joints and corners, cut the foam at a 45-degree angle so the pieces fit together snugly. Don’t leave gaps—cold air can get through even small openings.
Step 5: Secure the Insulation
Use aluminum foil tape or PVC tape to seal the slit in the foam and secure any joints where pieces meet. Wrap the tape around the insulation every foot or so to keep everything in place. Don’t use duct tape—it doesn’t hold up well in cold or damp conditions.
Step 6: Insulate Valves and Fittings
Valves, elbows, and other fittings need protection too. You can buy pre-formed insulation for these areas, or carefully cut and fit pieces of foam around them. Make sure everything is covered.
Step 7: Install Heat Cable if Needed
If you’re adding heat cable to particularly vulnerable pipes, wrap it in a spiral pattern along the length of the pipe according to the manufacturer’s instructions. Secure it with electrical tape, then cover it with foam insulation. Plug it in and test it before finishing the installation.
Special Considerations for Louisiana Homes
Here in Louisiana, we have some unique challenges when it comes to pipe insulation. High humidity can affect certain insulation materials, so choose products that resist moisture and mold growth. In crawl spaces that might flood during heavy rains, consider how water will affect your insulation choice.
Older homes in areas like Mandeville and Hammond often have plumbing that’s been modified over the years, which can make finding all your vulnerable pipes tricky. Take your time to trace your plumbing and check all potential problem areas.
When to Call a Professional
While pipe insulation is definitely a DIY-friendly project, there are situations where calling in the pros makes sense. If you have pipes in hard-to-reach areas, aren’t comfortable working in tight crawl spaces, or discover existing pipe damage while preparing for insulation, it’s time to give us a buzz.
We can also help if you’re not sure which pipes need attention or want advice on the best insulation strategy for your specific home. Sometimes a quick consultation can save you from wasting time and money on the wrong approach.
Maintaining Your Pipe Insulation
Once your pipe insulation is installed, check it periodically to make sure it’s still in good shape. Look for areas where the foam might have shifted or torn, and replace any damaged sections. Before winter arrives each year, do a quick inspection to ensure everything is still properly covered.
Protect Your Pipes This Season
Pipe insulation is one of those smart preventative measures that can save you from a plumbing emergency. Taking a few hours to insulate your vulnerable pipes now means you won’t be dealing with burst pipes and water damage when temperatures drop.
If you need help deciding which pipes need insulation, want advice on the best materials for your home, or prefer to have professionals handle the job, Goodbee Plumbing is here for you. We serve homeowners throughout Covington, Ponchatoula, New Orleans, and the surrounding areas with honest advice and quality workmanship.
Contact us for a phone estimate or to schedule a plumbing inspection. We’re happy to check your pipes and let you know what needs attention before cold weather arrives. With more than 25 years of experience and same-day service available for most jobs, we’re the team you can count on to keep your plumbing protected year-round.